DIY lampshades and lampshades: made of thread, fabric, paper and other materials. Lampshade frame for floor lamp made of wire. Soldering with soft solder How to cover a lampshade with fabric

Lamps are not just a source of artificial lighting in the interior, but also an important decorative element, without which the composition looks incomplete. You can create bright accents by making a lampshade for a chandelier with your own hands, because it is not at all necessary to spend huge amounts of money on purchasing designer models. Read about the nuances of work in our article!
Where to begin?
When creating a lampshade with your own hands, keep in mind that using a regular incandescent lamp is not the best idea. It is better to opt for energy-saving light bulbs that do not heat up so much and, accordingly, do not heat nearby parts, thereby ensuring safety. In addition, they are quite economical, which allows you to save money on electricity, and are also durable.
When choosing a material for a lampshade, focus on both aesthetic properties and technical characteristics. Firstly, these must be environmentally friendly, preferably natural, bases that will not distribute unsafe substances with minimal heating.
Secondly, the lampshade should not collect a lot of dust: some surfaces, like fabric ones, are more prone to this than others. Choose an option that is easy to clean and can be easily wiped with a damp cloth. This does not apply to paper, but due to the cheapness and simplicity of the material, such a chandelier can always be replaced if necessary.
Thirdly, the chandelier should illuminate the room well without darkening it. However, for some interiors, dim lighting is more suitable: in a nursery, bedroom or living room for an intimate atmosphere. In such cases, you can show your imagination by making a lampshade that creates light patterns in the room. You, as the author, can implement any of your decisions - and this is probably the main advantage of homemade lampshades.


Selecting a lampshade to match the interior style
A chandelier can become a bright accent in the interior or an inconspicuous but important addition. With any choice, the lampshade should harmoniously match the style of the room.
Unfortunately, not every product can be created with your own hands. For example, classics are characterized by elegant crystal, glass or metal products that cannot be made independently. But there are other options.
Minimalism
A laconic and laconic composition of minimalism can easily be disrupted due to one extra detail, which will be especially noticeable in such an interior. Regardless of the type of room, simple geometric shapes, the absence of hanging elements, as well as a uniform color scheme that is included in the overall palette of the space will look appropriate here.
Metal frame structures that slightly darken the light, or paper shades without decorative details, are suitable.


Loft
This is where you can really go wild, in a loft interior, in which homemade products made from unusual materials will look organic. It’s not scary if the appearance of chandeliers reveals their non-manufacturing origin, because many details of this style highlight their imperfections as their main advantage.
For lampshades, you can even use familiar objects: transparent cans, metal utensils, frames made of thread or wire. If the ceiling height allows, then a long pendant chandelier with a minimalist cap would be an excellent option.

Scandinavian style
Despite its northern origin, this style of interior design looks very cozy and modern. Minimalist in its essence, the Scandinavian style prefers natural materials, as well as light, mostly white, colors.
There are many options for chandelier design - the style does not greatly limit the shape. But not everything can be created on your own. Ball-shaped, airy models made of thread or paper are suitable.


Provence
Coming to us from distant French villages, Provence prefers the simple, cozy aesthetics of natural materials, floral patterns, and light shades. This is approximately what a lampshade for a chandelier should be like.
Products made of fabric or lace with a round shape look appropriate. With a small level of skill, you can decorate a glass dome with decoupage, thereby saving money - after all, despite its simplicity, authentic Provence involves significant costs in the arrangement.


Paper lamps
Despite the fact that paper is not considered the most reliable basis for lampshades, the ease of working with it and its noticeable low cost have made this material very attractive among handicrafts. In addition, with its help you can update your interior at least every month, creating new crafts.
Origami lampshades
Who wasn’t interested in origami as a child, designing little animals or complex modular paper products? Now you can use your skills for more practical purposes. However, even people who have encountered this activity for the first time can also easily master it and make origami lampshades for a chandelier with their own hands.
These are laconic designs of different geometric shapes that will fit perfectly into a modern interior. It is not recommended to use very strong paper, as it does not transmit light well.


Figured products
However, lovers of more varied decor can create lampshades of a wide variety of shapes from paper. For example, surround the lamp with paper houses, butterflies or envelopes.
The appearance of such a lampshade also depends on the surface - plain, patterned, newspaper, and so on. By combining these materials, completely different effects can be achieved.

Chinese lanterns
If you have paper lanterns at home, do not rush to use them as an independent lamp, because this is an excellent basis for other experiments.
It can be covered with anything you like, but to avoid a homemade look, we suggest decorating the ball with small paper flakes or long “feathers” that will gracefully hang down to the bottom.


Lampshades made of threads
Various threads and ropes are an excellent base for a lampshade, which is suitable for creating an intimate atmosphere due to the darkening effect.
Graceful cocoon
A round lampshade made from randomly twisted threads looks very simple and at the same time stylish. In order for such material to hold the desired shape, it is fixed with glue on a balloon, which is delicately removed after finishing the work.
Although the field for creativity here is small, you can always experiment with colors, weaving in several shades.

Knitted lampshade
This solution made from threads looks less chaotic. The main conditions for making it are the ability to knit or the presence of a grandmother who will kindly knit a napkin for you. The finished product must be placed on any base - a metal frame, a transparent container, a Chinese ball. Similarly with the first option, you can attach the lampshade to the balloon using glue.


Bottle lamps
Stylish chandeliers for different types of rooms can even be created from bottles. This includes both glass and plastic containers.
Glass bottles or jars
The principle of working with such a base is simple: choose the most beautiful one and hide the lamp in it. Elongated bottles or small jars can be used. It is necessary to make sure that the glass transmits the amount of light required for the room, and if there is not enough light, several sources can be used.
If the chandelier plays more of a decorative function, the bottle can be covered with acrylic paint or painting.


Plastic lampshades
Plastic bottles should not be used untouched. But it’s quite possible to make cheap parts from them for a homemade lampshade.
Luxurious (as far as this word is generally applicable to plastic) look chandeliers from the bottom of ordinary bottles, which are shaped like a flower. They are fastened together with wire for better fixation, creating a variety of compositions.
Another option is a 10-liter eggplant covered with plastic spoons, which are lined up in several rows, like scales. The design will transmit muted but uniform light, which will further decorate the product.


Lampshades made of metal elements
Metal products also offer rather unusual solutions for chandeliers. Fortunately, you don’t need to make them yourself, so you don’t need any special skills in working with metal. But a spectacular appearance is guaranteed in any case.
Kitchen appliances
Don’t rush to throw away your old spoons and forks - you will need them to create an original design. By placing a dozen fixtures around the lamp, you will get an excellent shade for a kitchen chandelier that fits perfectly with the theme.
The same effect can be achieved by using, for example, a grater. In general, you can experiment with any devices, especially if your interior is decorated in a loft style. Just make sure that the metal parts do not get too hot.


Gear dome
If you want to add a little steampunk into your life, make a chandelier shade out of gears. You can get them by dismantling an old bicycle or buy them at a flea market. But the result is definitely worth the effort!


We looked at the features of making lampshades for chandeliers with our own hands and the most popular solutions from various materials. But, of course, there are many more interesting options - as evidenced by our selection of photographs. Enjoy watching!


We create our own home. And how cozy it will be depends on us. Even if you are the temporary owner of your home, you can make it cozy without major expenses. The main thing in this matter is to put your soul into it. But having ennobled the walls and windows of the apartment, you cannot leave a single light bulb hanging from the ceiling bare. Let's think about how you can make lamps with your own hands.


Advantages of homemade lampshades
The need for hand made lamps is dictated by various circumstances: some were unable to choose a chandelier for the updated interior, some have a difficult financial situation, and others feel the need to decorate their home with their own hands.
Advantages of homemade lampshades:
- independence from store assortment;
- low budget;
- self-realization;
- uniqueness (exclusivity);
- originality;
- availability of material for work.

Materials
The chosen concept should help you decide on the choice of material for the lamp. What is your room like, what lamps are suitable here, where will they be located (on the wall, ceiling, floor)? In this case, the material for the lampshade can be completely different things: threads and veneer, bottles and branches, paper and basin, cup and lace, wire and disposable spoons, fabric and beads. From the frame and available materials you can make real beauty.

Lace lampshade
To make it you will need about 10 knitted identical or different napkins of one or more colors (optional), a balloon, wallpaper glue and a container for it, a brush, threads, a light bulb socket, a light bulb, oilcloth or newspapers for bedding. The exact number of napkins depends on their size and the size of the ball.
The sequence of our actions:
- Dilute wallpaper glue (one pack should be enough).
- Inflate the balloon and tie it.
- Tie it so that it is approximately in front of your eyes or below. For example, on a clothesline or stepladder.
- Spread one napkin on the mat and coat it liberally with glue.
- Carefully glue the napkin onto the ball.
- Spread the next napkin and glue it so that one napkin lies slightly on top of the other.


- Glue all the napkins, lightly connecting them to each other.
- Leave a small hole at the bottom without a napkin so that you can install the socket and light bulb later.
- Your ball should dry for about a day.
- After a day, making sure that the glue has dried completely, pierce the ball and remove it from the lampshade.
- If you want to give the lamp a different color, before piercing the ball, paint the napkins with acrylic paints and leave them to dry again.
- Thread an electrical wire through the center of the napkin at the top point of the lampshade, to which the socket will later be connected. Attention! Don't forget to disconnect the power supply from the wires!
- Install the cartridge.
- Screw in the light bulb.


If you are installing such a lamp on an already hanging socket, you can do the following:
- at the top point of the lampshade, leave a circle with a diameter of approximately 10 cm;
- hang a circle of cardboard on the cartridge to match the napkins with a diameter of approximately 15 cm;
- Carefully pass the cardboard inside the lampshade and fasten them together with a stapler or double-sided tape.
Lamp made of plastic bottles
Most likely, no one will name how many options for lampshades made from plastic bottles exist. But there are two principles of use: the bottle is decorated with other materials, or elements for decoration are cut out of the bottle.
To implement the first principle, we need a three- or five-liter bottle. Its neck will be put on the cartridge, and the bottom needs to be cut off. If the bottle is made of colored plastic, then the simplest chandelier for a simple country house is already ready. But plastic can be painted with designs, and small elements such as buttons, pieces of mirrors, and shells can be glued with liquid nails. Or cover it with acrylic paint of one color, and apply an uneven layer of paint of a different color on top using a comb. In a more complex version, plastic disposable spoons without handles in the form of scales are glued throughout the bottle.

Such a lampshade will be harmonious with retro style.
To implement the idea of the second principle, you need bottles of any size, but of different colors. Cut out any shapes from them: leaves, flowers, geometry. The main thing is that there are a lot of them. The lampshade will need a frame in the form of wire rings. Connect the different levels of the frame together with a vertical wire. Using fishing line or thin wire, attach a huge number of cut out figures to the frame. They can fit tightly to the frame or hang freely from it.


Paper lampshade
Cardboard, rice paper, self-adhesive, corrugated - whatever kind of paper is used for homemade lampshades. For the Art Nouveau style, we suggest you make a lampshade from multi-colored cardboard ribbons. Choose colors. Prepare strips 2-4 cm wide, a stapler or good glue. Randomly thread the strips into each other, fasten them in such a way as if you have a lump of remnants of different threads in your hands. It should not be tight so as not to interfere with the light bulb.
Size is at your discretion. By slightly spreading the strips, you can easily hang the ball on the cartridge.


Use an energy-saving lamp - it heats up less and is safer.
Grapevine lampshade
To make a lampshade from wood, you need to select suitable driftwood or branches and process them properly. In the case of a vine, almost any one will do, with stepsons and even dry leaves. Such a lamp can be wall-mounted, floor-mounted, or ceiling-mounted. It requires a metal frame of any shape through which the branches will be passed. When the lampshade is ready, cover it with furniture varnish - it will be very beautiful.


How to make one from threads and a ball?
One of the simplest but most original ideas is a lampshade made from threads wound around a balloon. We need threads (woolen, twine, thick cotton), PVA glue, brush, balloon, Vaseline.
- Inflate the balloon. The larger it is, the larger your lampshade will be. A more familiar option is a round ball, but who said that this is necessary? Perhaps your chandelier will have three oblong shades.
- If your lampshade has an open bottom, then draw a border on the ball for further winding.
- In order for the ball to be easily detached from the threads later, coat it with Vaseline using a brush.
- As you wrap the threads around the ball, coat them with glue, layer by layer. Don't skimp on glue.
- The more layers, the stronger the structure. Try using threads of different textures, winding them in different directions.
- Leave your chandelier to dry.
- After about 24 hours, pierce the balloon and remove the remains from the lampshade.
- Carefully cut out the hole for the cartridge.
- Insert the light bulb - the lampshade is ready.
- If it is monochromatic, then it can be decorated with artificial flowers, airy butterflies or other small elements.

photos
Lampshade for a standing lamp: master class
Such a lamp is not only in the field of vision, but also in the field of touch.
To create a pleasant atmosphere, make the floor lamp soft:
- Choose a boa or fringe with fluffy threads in one or more colors.
- Glue a boa or fringe onto the old lampshade strictly along the circumference, wrapping it around the lampshade several times.
- You can decorate with colored material not only in a circle, but also chaotically, with spots.
- If desired, you can decorate the lamp leg and the base itself.

The design itself will be voluminous and will not require additional elements.
Making for a wall model
The house lamp looks great on the wall. It can be a completely different model. But if you install such a lamp in a child’s room, place the baby’s favorite toy (for safety reasons, not fabric and away from the light bulb) in the door of the house where the light comes from.
No less interesting are figures made of dense materials (a cat, a flower, a month) mounted on a frame. The light does not come through the figure, but from under it, scattering the beam. As a rule, sconces are used specifically to dim the light, which means that any opaque models would be appropriate here.

photos
Handmade options for street lighting
When talking about street lighting, we mean the area in front of a private house or cottage. Although, if you live in a multi-story building where people take care of what they have in the yard, then these ideas may suit you too.
Lighting the area in front of the house can be:
- facade, when lamps are mounted on the walls of the house and veranda;
- landscape, which can highlight the beauty of your site, emphasizing paths, plants, figures;
- street, represented by lanterns that create diffused light in the area.


The types of light source are also different:
- from the mains;
- from batteries;
- from solar panels.

Facade lamps can look different: LED strip around the perimeter of the house, sconces made of driftwood and branches. The light source will be the electrical network.
Much more imagination can be used in landscape lighting. Install multi-colored battery-powered lamps into several figures of animals and fairy-tale characters made of plaster, wood or polystone and place them around the area - the effect will be stunningly beautiful. But turning it on and off is inconvenient. Try installing solar-powered lights. In the evening they will light up on their own.


Throw LED strips powered from the mains onto trees and shrubs, and in the evening you will find yourself in a fairy tale. In stores and on the Internet, they sell lamps that operate on the principle of solar panels, with a stand that you simply need to stick into the ground in an arbitrary place. In this way you can decorate a pond or gazebo. The glass of the lamp can be pre-coated with a pattern or plain paint.
If there is no electricity or solar panels, then your evening will be brightened by candle lamps hidden in glass jars and hung from a gazebo, fence, or trees. Jars can be decorated using threads, paint, colored self-adhesive paper, and corrugated paper. But be careful with such illumination - open fire loves the careless.

When starting to arrange the interior space, it is important to think through every little detail. After all, we all subconsciously strive for comfort and it is the smallest details that can create a special atmosphere, convey the general idea, mood and character of the room. Professional designers claim, and interiors clearly prove, that the right choice of chandelier can not only decorate the interior of a room, but also make life brighter and more fun. Beautiful lampshades for chandeliers with an original design give special grace and luster to the lamps. You can find out how to make them yourself and what materials are best to use for this in this article. A detailed, step-by-step master class, as well as a visual photo, will be an excellent help for you in this exciting process.
Material selection
When making a chandelier, it is difficult to single out one material that would meet all the requirements. Each of them has its own individual characteristics and features. For example, paper, which is the simplest and most accessible material, lends itself well to transformation.
Lamps made from glass shards and strips of metal have a dazzling shine and beautiful appearance. Wood and fabric add warmth and comfort to the interior. Lace lampshades are distinguished by their special beauty, captivating everyone at first sight.
In a word, you can make a chandelier with your own hands from anything, the main thing is to be smart and use your imagination in time.


A chandelier made of paper napkins is a rather bold, but justified experiment.
We will describe in detail how in an ordinary object you can discern its creative potential to create an exclusive decorative element in this article.
Step-by-step instructions, with a description of each step, will help you make from available materials incredibly beautiful and unique lamps that will be an excellent addition to your favorite interior.
What you need to pay attention to before making a chandelier
Many people are interested in how to properly make a chandelier in and other rooms. After all, you want this element of the interior to be not only beautiful, but also functional.
On the one hand, a chandelier is a lighting device that can provide the proper level of lighting in an apartment. After all, a lot depends on the choice of light in the room, including eye safety. On the other hand, I want the ceiling structure to complement the interior design, creating a special atmosphere of warmth and comfort.
When making a chandelier, first of all you need to take into account the height of the ceiling. For example, for low people a chandelier with a bar mount is suitable. So, the ceiling will look visually higher. If the ceilings are high - 3 m or higher, then it is better to opt for a pendant lamp with a hook mount.


Lamp selection
For any room you need to take an individual approach to the intensity of its lighting.
For a small bathroom you will need 80-100 W.
Kitchens require a lamp power of at least 120-150 W.
The living room and hall cannot do without light bulbs in the range of 150-300 W.
The number and power of lamps is calculated based on established standards - 20 W are required per 1 m². electricity. It is also necessary to take into account the parameters of the room, its dimensions and reflective properties.

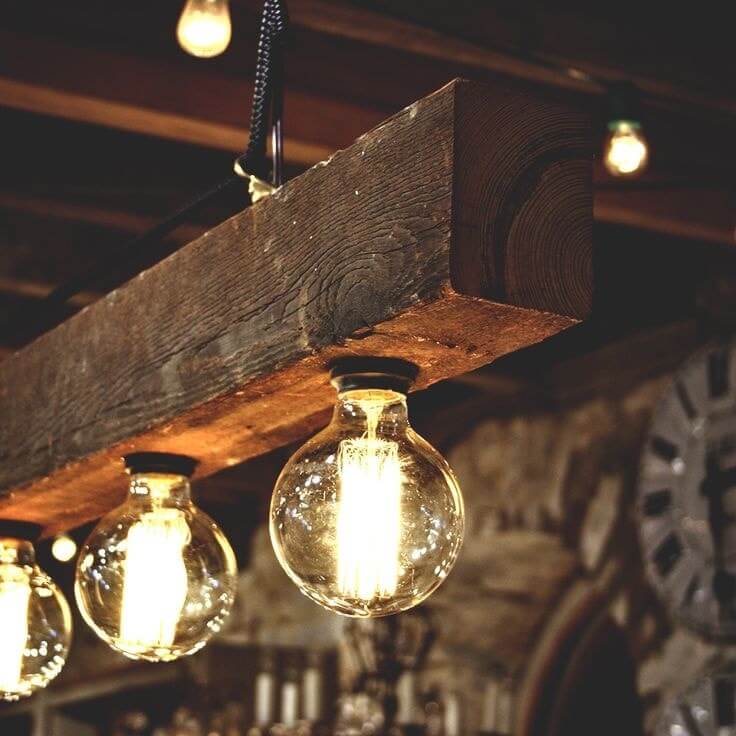
Designer Edison lamps - look beautiful and unusual
Design of the lampshade
The appearance, decor and design of the lampshade occupies an important place in the design of a chandelier. It is selected to match the interior of the room, depending on the style. Crystal for classics, metal and glass for, wood will fit perfectly into country or chalet style, fabric and silk are perfect for Provence style.
To illuminate a room on several levels, you can additionally make wall sconces or floor lamps.


Step-by-step master class on making
To make a beautiful ceiling decoration, you don't have to start from scratch. Look around, you probably have something in your house that you haven’t used for a long time. And who knows, maybe it will become the main item in the manufacture of the original lamp. Moreover, there are now more than enough ideas and inspiration for creativity on the Internet.
Important! The best place to start searching for the things you need is in the kitchen or balcony. It is there that we store all sorts of rubbish that we once needed so much and which, as often happens, is so difficult to part with later.
Spectacular chandelier made from mugs
No matter how strange it may sound, it is from dishes and other kitchen utensils that the most unusual and interesting models of lamps are obtained. For example, tea mugs are an ideal material to make a spectacular lamp.
For work we will need:
- Mugs
- Saucers
- Drill
- Porcelain drill with special hole

We make it quickly and easily
- In the bottom of the mug, use a drill to make a small hole for the wire, attach the electric cartridge and bring the wire out. It is advisable to seal the hole with a plaster mixture.
- Next, you need to glue the mug to the saucer, where there should also be a hole, insert a light bulb and hang the newly made lamp in the right place.
As you can see, original and fashionable designs can be obtained from completely ordinary objects.


Mesmerizing yarn chandelier
Since this is a fairly simple product, to make it we will need a minimum of things, namely:
- Wire with a cross section of 4-5 mm.
- Wire cutters
- Thin thread
- Multi-colored yarn
Manufacturing instructions:
- A ring is made from wire, the diameter of which will correspond to the future size of our chandelier. To get a perfectly even circle, it can be wound on some object that has a cylindrical shape.
- We bite off the excess wire with wire cutters, leaving a reserve of 2-3 cm on each side. We tie the ends with a thin thread.
- All that remains is to decorate our chandelier beautifully and brightly. To do this, we cut the yarn threads so that the length of each segment is twice the height of the lampshade.
- One by one, we tie the resulting strings onto a knot until we hang them all over the ring. From the same yarn we make a fastening for the hook.
Such a lampshade can be used both as a chandelier and as a decorative element decorating the interior of a room.


By combining the skills of macrame and papier-mâché you can get a stylish chandelier for the bedroom
Important! To make such a lamp, instead of wool yarn, you can use any other thread. The main thing is that it harmoniously fits into your interior.
Unusual lamp made from a teapot
You will learn how to make a chandelier from an ordinary teapot yourself in this master class. Here's what we need for this handmade masterpiece:
- Kettle
- The wire
- Electrochuck
- Metal chain
Step-by-step manufacturing guide
- First of all, the lower part of the teapot is cut out. This is done in such a way that the resulting cutting edge is not sharp, otherwise you could get hurt on it.
- Next, an electric cartridge is fixed to the lid of the kettle, the wire of which is led out through a small hole drilled at the top.
- A chain is attached to the handle of the kettle, and a wire is threaded through the links. The lamp is ready.


Let's breathe new life into bottles
Glass bottles, especially if they have beautiful shapes, can be used to make a wonderful chandelier. Required material:
- Thin rope
- Flammable liquid (alcohol or gasoline)
- Glass bottles (preferably colored)
- Edison lamps (having a beautiful spiral)
- Wire and electric cartridge
Do it yourself
- We wrap a rope around the bottom of the bottle, after wetting it in a flammable liquid. Then we set it on fire and let it burst, and we begin to slowly rotate the bottle around its axis until the rope burns out completely. After this, we lower the bottle into a container with cold water, wrap it with a towel and, using a little force, break off the bottom.
- To ensure that the cutting edge is not sharp, it must be sanded. To do this, it will be enough to swirl the bottle in sand or fine gravel for a couple of minutes.
- All that remains is to mount the electric socket correctly, stick the wire through the neck, and screw in the light bulb. From the remaining bottles, the remaining lampshades are made in a similar way.
This chandelier will fit perfectly into any interior, especially if you hang it above the bar counter.


Decor from cans
Lamps made from cans are no less beautiful. They are made in the same way as from bottles. The only difference is that the bottom of the jar does not need to be cut off, since clear glass is usually used for lampshades.
We need:
- Beautiful thick-walled jars (preferably with a relief pattern)
- Hammer and nails
- Wire, electric socket
- Spray paint
- Edison lamp
How to do it right
- To begin with, using a nail and a hammer, holes are punched in a circle in the lid, after which the inside is carefully squeezed out. The diameter of the circle must correspond to the diameter of the base in the cartridge.
- We insert the cartridge into the cover and mount the wire.
- Next, we paint the lid together with the cartridge in the color of our choice. Metallic paint with a golden shimmer will look best.
- All that remains is to screw in the light bulb, close the lid and install the lamp in its proper place.


We all know what a globe is, but not everyone knows what amazing things can be made from it. For example, a cute lampshade for a chandelier that will fit perfectly into the interior of a children's room.
Here's everything we need:
- globe
- Bulb
- Electric chuck with holding element
Step-by-step master class
- Usually the design of the globe is not solid, so in order to get the desired element, it is necessary to divide it into equal two parts (hemispheres).
- Next, at the top point of the hemisphere, you need to make a hole for the cartridge. For this, it is best to use a drill with a crown.
- The electric cartridge is installed in place and securely fixed by the holding element. Congratulations, your chandelier is ready!


Hanging structure made of horns
Making a unique lighting device from deer antlers is quite simple, the main thing is to have the necessary material on hand.
Such designs are famous for their special sophisticated appearance and are best suited for rooms with high ceilings. Such chandeliers are used in many interiors, but they look especially attractive in country, chalet or rustic style.
As a rule, the shades of such chandeliers have various shapes, and only natural material is used for their manufacture.
We will need:
- Antler
- Rope
- Copper wire
- Electrical socket and wire
- Bulb
Make a chandelier like this
- Observing the safety rules, we connect the wire to the electric cartridge according to the diagram.
- Next, the wire needs to be beautifully wrapped with decorative rope. For better fixation, you can use universal transparent glue.
- Using copper wire, horns are attached to the lower part of the resulting rope, placing them 2 cm above the cartridge.
- We repeat a similar procedure with the remaining lampshades, later combining them into a single composition.


Ideas for making beautiful lamps (photo, video)
We hope that the useful tips and photos presented in the article will help you not only make beautiful shades for chandeliers with your own hands, but also save your family budget.
If you have long been wondering how to decorate your apartment or house without significant costs funds and time, we propose to transform light sources, namely make a lampshade for floor lamp with your own hands. You probably know that something beautiful and unusual in a store can be very expensive, but you don't have to spend a lot of money to make something amazing. We will use the most common materials that you will definitely find in your household. Any lampshade begins with a frame; if you have a ready-made one, all you have to do is decorate it; if not, don’t worry, we can easily make the base on our own.
1. We make the frame
Any of the elements that we will later use as decor must be attached to something. In order to quickly cope with this task we will need: thick wire, pliers, cardboard. Any the frame consists at least two rings connected by spacers. Decide on the desired shape and size of the future lampshade.
Let's consider the simplest type of frame - conical. The lower ring will have a diameter of 30 cm, and the upper one - 20 cm. To to know wire length, which needs to be cut, you need to multiply the desired diameter by the number “pi” (3.14), that is, 30 * 3.14 = 94.2 cm. The ends of the wire must be connected and bent using pliers. The height of the spacers will determine the height of the lampshade itself. For the reliability of the design, we recommend making at least 4 transverse fasteners, which will be attached to the rings at an equal distance. It should roughly look like this: 
If you are preparing a frame for a future fabric lampshade, then you need to wrap it with thick cardboard so that the fabric has something to attach to. To do this, do pattern. Wrap the frame in newspaper, mark the line where the newspaper makes a full turn, and leave a centimeter of margin for gluing, and a line for the top and bottom. Cut off the excess and transfer the resulting sketch onto cardboard. You can attach it to the frame using a hot-melt gun with glue, do not forget to coat the joint well, and remove excess glue with a piece of cloth. Your frame is ready, you can start decorating. 
2. Paper or cardboard lampshade
Paper is the most simple And cheap material, which can be easily transformed, has many colors and different densities. The frame wrapped in cardboard can already be used as a lampshade if you decorate it a little. It may not be whole, but have holes V butterfly shape, flowers, circles, hearts, diamonds and other shapes, which can then be hung from the edge of the lampshade using a thin fishing line. Using cardboard of different colors you can create smooth transitions or a contrasting composition. Such a lamp will look great in, because when it emits light, small shadows in the form of carved figures will appear on the walls and ceiling.  You can decorate the cardboard frame with corrugated paper or molds For baking cupcakes. Open one mold wider, drop a little in the center and place a second, more closed mold inside. You can connect three or more shapes in this way. You will end up with air outlets that need to be placed as close to each other as possible. In the end you will get very gentle and light lampshade, from which a soft, subdued light will emanate. Paper figures glued to thin strips and secured to wire frame rings are also suitable as materials. For a more aesthetic look, use paper of different colors, which will form a smooth transition from darker shades at the bottom to lighter shades at the top. Remember that paper is not a durable material, but it is easy to replace if you get bored with the appearance of the lamp and come up with something new.
3. Fabric lampshade
Depends on the desired luminous flux. Thicker and darker fabrics will give a muted, soft light. The chosen one is also important material color. Green and blue shades will create cool lighting, while red, yellow, and orange will create warm lighting. Once the fabric has been selected, it is necessary make a pattern. You can use the same piece of newspaper as in step 1. To make the fabric cover look more neat, sew it on a machine, then turn it inside out and put it on the frame. You can simply carefully hem the edges of the pattern, iron it and glue it to the frame with glue. In both cases, do not forget to leave stock on seams.  The cover does not have to be made from a single piece; it can be multi-colored rags or a combination of plain and colored fabric. If desired, you can draw or embroider on fabric beautiful patterns or big flowers. A hand-embroidered lampshade will definitely surprise your guests. You can glue a beautiful fringe with beads along the edge or wrap it with ribbon and tie a small bow. This way you can hide minor imperfections. To make such an item look more harmonious in the room, coordinate its color with other items. For example, with or pillows on the sofa.
4. Threads, yarn, twine
These materials will be useful to us for making lampshade-ball. Make one like this DIY lampshade Even those who are sure that needlework and crafts are not at all their element can do it. As basics we will use a balloon or an old rubber ball. We will also need PVA glue, a deep bowl and a wide brush. The essence of the method consists of winding threads around an inflated balloon. The color, thickness and number of threads used are purely individual. If you want to get a more textured and dense shade that will let in little light, use twine and wind until you cover almost the entire surface of the ball.
Before you start wrapping, lubricate the surface of the ball with rich hand cream or oil. You'll thank yourself for this when you remove it from its dried-out lampshade. Pre-soak the selected threads in glue, adding a little water to it. Let them lie down and soak up this solution. This must be done so that the layers of wound threads not only adhere to the ball, but also stick together. Inflate the balloon to the desired size, draw on it with a marker border up and down.  The upper bound will serve place for cartridge With . There should be no threads in these places. Start wrapping from the top edge. First, carefully lay out several turns of thread at the level of the mark. You should end up with a small circle, then bring the thread to the bottom border and do the same. If you don't want to, you can do without the bottom hole. Now that you see your limits, you can wind in different directions, creating as many intersections as possible and pulling the thread a little.
  Each layer lubricate with glue using a brush. When you reach the desired density, cut the thread and hide its edge under the circle of the upper border. Leave your creation in a warm place until completely dry. Just under no circumstances place it near . The flow of hot air will cause the ball to deflate faster than all the layers dry, and you will get a lampshade of any shape, but definitely not round. Once dry, puncture the ball. By the way, using threads of several colors you can achieve very interesting combinations. A composition several of these lampshades of different sizes will look very harmonious.
5. Braid, ribbons, lace
This is very romantic and the delicate appearance of the lampshade, which will look great in a young girl’s room. In order to make it, a wire frame will be enough. Cover it with fabric and glue beautiful lace on top, or place lace ribbons directly on wire rings. Textile you need to choose either contrasting color, or to match the lace. This will look more impressive. The lace may not be located along the entire perimeter, but only along the edge, this will be even more interesting. Tulle and all kinds of ruffles and bows are suitable as additional decoration.  The most interesting thing about such lampshades is openwork shadows, which they will discard. Can be used as base material colorful ribbons or a beautiful braid. To do this, fasten the edge of the first tape to the lower ring and pull it to the upper one, make one turn around it and follow it back to the lower ring. Continue in this manner until you have filled all the empty space. To avoid gaps, overlap the previous tape by at least 1/3 of its width. Carefully glue the edge of the last tape on the inside, and to hide the imperfections, turn the top and bottom edges of the lampshade with a wider tape. Such a bright lampshade will resemble a rainbow and glow in different colors.
  If you have knitted lace napkins, and you don’t know where to put them, you can do with them the same way as in point 4. Soak it in glue, place it on the ball and let it dry. They will take the shape of a sphere and will look completely different.
6. Lamp made of beads and artificial flowers
A very beautiful creation requires painstaking and perseverance. You will need many colors, beads or large beads, fishing line, a needle and thread and glue. It is most convenient to place flowers on a frame with cardboard. It used to be very fashionable to decorate the walls with bouquets of artificial flowers, so you probably have them collecting dust somewhere in your boxes. And in just a few hours, or even earlier, you will look at them completely differently.  Separate the buds and some petals from the stems. You can even remove the plastic holders, but then you need to secure the petals with threads so that they do not fall apart. This way the parts will fit most tightly to the cardboard and stick easily. Arrange flowers and petals on the frame, filling the entire space. It's good if there is several varieties colors. You can make a beautiful flower arrangement on a lampshade made of plain fabric.
  Imagine that you are making a bouquet, and you yourself will understand how best to act. Along the edge of the lampshade, you can add a fringe of several beads on a fishing line, or glue them in different places on the petals. You can glue a few butterflies or a dragonfly, in general, whatever you consider necessary. And large beads strung on a nylon thread can be used as the main material. As in the example with ribbons, it is necessary to fill the entire perimeter of the frame with beads, fixing the thread alternately on the upper and lower ring.
7. Knitted lampshade
Very unusual and the most comfortable look of our product. If you have the skills to knit various patterns yourself, then this is simply wonderful. Remember that knitting take a lot of time, so if you want to present such an item as a gift, then start preparing in advance. There are many sets with the required number of threads and pattern patterns, just choose the appropriate size. If you haven't had time to master this skill, don't be upset. They will come to your aid old knitted sweaters and children's ones that are already small for your child. Depending on the size and shape of the lampshade, you can even use sweater sleeves.  The top and bottom will have to be sheathed to prevent them from unraveling. Place the selected part on the lampshade, you can tie it with a ribbon on top and decorate it with decorative elements, or you can simply sew it. If wrap yarn in the color of the lampshade and cord power supply, which will be in sight, the result will be a rather nice and complete composition. Will fit as thick knitting, made with knitting needles, and a more delicate version with gaps, made crochet To secure this option, use glue. Apply it pointwise to the surface of the wire rings and press. Do not neglect fabric or cardboard frames. With their help, the shape of the ceiling will be better conveyed. Complete the composition with small knitted pompoms or large beads tied with thread. Surely all your friends will be surprised to see such an interior element.
8. Lamp made from old hangers
Broken wooden hangers, or those that are long overdue for renovation can be found in every home. Finally, you can not just throw them away, but find a more worthy use. By the way, these may not necessarily be hangers. Old ones will do too broken slats. They are quite thin and have an arched shape. Before assembling such a lampshade, immediately think about its color. If you're a stickler for all things natural, just run sandpaper over the wood surface to remove any minor imperfections, and then open it up. If you want to make the composition multi-colored, use spray paints. Now it's time to think about how we will arrange the elements on the frame. Most simple option looks like that: 
The figure shows that there were deleted metal hooks, and the hangers themselves are sawn in half and simply glued to the cartridge. You can do it this way, or you can work a little harder and get a more interesting result. We will need . Remove hooks, paint hangers and drill a hole at one end. Insert the wire into the resulting hole, placing the required number of hangers on it. Now fasten the edges of the wire, and insert the cartridge with the wire into the space that is formed after fastening. Place the hangers evenly with their backs facing each other and secure them in the middle with a metal tie. You will be surprised. Making a similar lampshade for a chandelier with your own hands is not difficult and does not take long. 
9. Plastic bottles, spoons
There are definitely different colors in every home. So that no one even thinks that this is a product made of this material, we suggest that you work hard and cut bottles for small details in the form of leaves, flowers, butterflies or any other shapes. We used leaf shapes. Draw a few templates of different sizes, outline their outlines and start cutting out. When you finish cutting the required number of elements, give them a natural look. Using the blunt nose of small scissors, squeeze out the veins on each leaf. Pin on the frame parts can be done in two ways. Either glue a wire to each element and wrap them to the frame at different levels, or glue them to a cardboard frame with glue. We advise you to give preference to the longer, but also more beautiful, first method. So the lampshade will come out more transparent, and all the details will be noticeable due to placement at different heights.  If it's too much for you for a long time And tiring simply cut off the tops of the bottles, leaving 10 cm at the top, cut them into thin strips, bend them outward and secure with glue. Ready flowers glue to the frame.
  No bottles were found, but there are a couple of sets plastic spoons after the picnic, they will also have a use. Let's do it pineapple lamp. For the frame we need a plastic 5-liter bottle. Carefully cut off the bottom and degrease the walls. Now let's prepare the spoons. You need to separate the handle, leaving about 1 cm. When you have cut all the spoons, start gluing them from the bottom row. Each subsequent row should overlap the previous one by about half a spoon. Try to cover the entire frame in this way, right up to the neck, so that you get neat edges that will be hidden under the cartridge. Your lampshade is ready!
10. Don't throw away tetrapacks
 Yes, you were not mistaken, we will create real miracles, practically, from waste. Not all types of packaging are suitable for us, but only those that have a mirror surface inside. This type of lampshade will perfectly complement the interior, in which the emphasis is on various geometric shapes or where strict linear shapes predominate. You will need a lot of tetrapacks for this venture, so you will have to save up the source material for some time. The packaging should be carefully cut into one solid piece. Now we cut it into strips measuring 130x21 mm, divide it into six equal parts and fold triangles from these strips.
  Now comes the most difficult part - the individual elements must somehow be combined into complex shapes. We cut the fastening tapes measuring 75x19 mm, fold them into four parts, unfold them back and use them to fasten two triangles. Next, according to the same scheme, you need to collect 108 hexagons and 12 pentagons. Don’t be alarmed, when you get the hang of it, everything will work out by itself.
  You can get by with regular glue, this will make things much easier and faster. When all the elements are ready, you can assemble them into a sphere or a regular cylindrical lampshade. In the latter case, pentagons will not be needed. Just glue all the parts together. In the case of a sphere, you will have to tinker. You can inflate the ball and use it as a support when gluing elements, and then burst it and take it out through the hole. Now you can be proud of the work you've done. You definitely won’t see such a lampshade in any store, and when you turn on the lamp, the play of shadows will captivate your whole family.
11. Newspaper tubes
Recently it has become very popular weaving products from newspaper tubes. Skillful housewives make baskets for storing various items, sew covers for them, decorate, paint and even sell them online. We thought that in this way it would be quite possible to make a beautiful lampshade for a chandelier that would look great in or. We don't even need a frame, but we will need a lot of newspapers.
If you use pages glossy magazines, then the tubes will come out much stronger. It is necessary to cut a large number of paper strips, then twist the tubes. It's much easier to do using knitting knitting needle The ends must be coated with PVA glue and then allowed to dry thoroughly. Try to do so length the tubes were at least 20 cm long. We will need about 100 pieces to make a medium-sized lampshade. Take three tubes and cross them together, you will get a six-pointed snowflake.  This is the beginning of our ceiling. To make it more convenient to work, place something heavy on top of the intersection so as not to displace the workpiece. Place the next tube on top of one of the rays peeking out from under the weight. The lower element must be wrapped over the attached one so that it rests on the adjacent vine. Repeat this step with all the twigs sticking out. You will be weaving in a spiral pattern. When you have completely walked around two circles, you need to expand the diameter. To do this, instead of one twig, use two twigs folded parallel to each other. Continue weaving until you reach the required size. Cut off the excess tails with scissors, secure the edges with clothespins and treat the entire surface with glue.
  Once the frame is dry with spray paint, give what he wants color and after drying, fix everything with varnish. On top you will have a cross that can be carefully cut off, thereby freeing up space for the cartridge. Instead of weaving, you can secure the tubes with glue, forming a sphere or other geometric shape.
12. New life for old cans
In order to make a stylish and unusual lampshade that will perfectly complement the interior with its soft, cozy light, you can use ordinary cans different sizes. It is necessary to remove all labels, remove any remaining glue from the surface, wash and dry well. Next we will use a small one and make holes on the walls. Draw desired with a marker pattern, Pour water into a jar and place in the freezer until completely frozen. This is done so that at the time of making holes, the jar was not deformed. The second option to preserve the shape is to stuff it tightly with paper. All that remains is to carefully make holes and dip the finished product in hot water to remove ice. You will get small cute lampshades, from which it is recommended to create compositions. The surface can be left unchanged, or it can be painted or wrapped in thin paper. 
Suitable for us glass jars, especially if they have a non-standard shape and color. However, you can give them any color, it’s very simple. Prepare sockets and light bulbs in advance. To place them inside, carefully make holes in the lids using an opening knife. You may need to replace the lamp in the future, so give preference twisting banks. The hole should be equal to the diameter of the cartridge, no more. Insert the threaded part into the hole in the lid, and then screw in the light bulb. Now let's get started registration the lampshades themselves. Wash and dry the jars thoroughly. Now you can paint them, paint them, cover them with beads or flowers, wrap them with colored threads or lace, in general, whatever you want. Secure the surface painted or covered with small parts with clear varnish and screw on the lids. Your lampshades are ready. 
13. Nautical lampshade
There are people who cannot live without the sea and try in every possible way to reflect their love for it in the interior of their apartment. Some people bring photo frames made of seashells, others hang pictures of the sea coast, and others cannot return from vacation without a bag of shells, which they then cannot find a use for. If you recognize yourself in this phrase, then especially for you we have prepared a small master class on making shell lampshade, as well as beautiful sea pebbles and everything you couldn’t pass by. For this we need frame, wrapped in thick cardboard, glue and your seafood gifts. Think about it in advance color lampshade. If you want to leave natural shades, then simply cover all the elements with transparent varnish; if you want to add a few different shades, then use, and then varnish. You can paint the finished lampshade, but the paint and varnish will flow into the joints between the parts and will not come out very neatly.  Now, using a heat gun, cover all or part of the surface of the frame with shells, aging leave as possible less gaps. Small pebbles can be glued in places on top of the first layer, this will add volume to the finished product. Such a cute piece of furniture, with a very characteristic mood, will always remind you of pleasant moments spent on the seaside.
14. Forest handsome
Very unusual and spectacular lampshade, which will appeal to nature lovers. Fits well in interior in style eco. Its name speaks for itself, and you were not mistaken if you thought that we would use as material what we brought from the forest. More precisely, we are interested wood twigs different thickness and weird shape. Twigs that are too thin are not suitable; they will break during the fastening process. Length branches should correspond to the desired height of the lampshade. Collect material from stock, because during the manufacturing process, not all sticks will definitely suit you. The most interesting thing this type of lampshade can boast of is shadows, which will be reflected on the ceiling and walls. They will create the feeling that you are in a real forest.  The branches must be washed well under hot water and dried by placing them on paper and providing access to oxygen. You need a little dry sticks ennoble. You can use a knife to cut off what you think are unnecessary knots or thin parts. Cover all elements on all sides with spray paint or just varnish. The gnarlier the branches, the more interesting the lampshade will be. We will need a regular wire frame without cardboard. We will attach the parts to it using thin wire or glue it with a heat gun, whichever is more convenient for you. Not a conical one will work well, but cylindrical shape grounds. Fill in the gaps very carefully and leave as few empty spaces as possible. You can add gaps in small pieces. After complete drying, the extraordinary lampshade is ready for use. Creating a similar lampshade for a chandelier with your own hands will be fun with your children.
15. Space lamp
Many in childhood dreamed of becoming astronauts and raved about distant galaxies. If your child now sleeps and sees himself in this role, we suggest decorating his children's room to match his dreams. Stationery stores sell planet models, which we will need. We will make multi-level lampshades in the form of a space system. To do this, we will need sockets with lamps and several models of different planets. The layout must be carefully divide into two parts. Before doing this, draw a circle on top, the diameter of which coincides with the diameter of the cartridge. Then you need to remove this area as well. In its place, place the lamp socket and glue the layout back together. These steps must be done for all layouts. If you haven't found a planet, you can make do globes different sizes.
  You can use halves, which is much more convenient, because it will be easier for you to replace the light bulb. It’s good to make a lampshade from the halves table lamps. You can use old ones world maps, wrapping them around the frame on top of white, thick cardboard. The spirit of travel will always be present in your home and inspire you to new achievements.
When making any of the above types of lampshades, remember that all materials are fire hazardous. Especially when they are exposed to frequent heat from incandescent lamps. Therefore, place all the details on distance of at least 15 cm from the center of the lampshade, that is, the minimum diameter of your product must be at least 30 cm. By following this simple rule, you will protect yourself and your home from unnecessary troubles.
It is not always possible to find in stores an offer of lamps that meets our needs. Often an old lamp takes on a rather unsightly appearance, and it’s a shame to throw it away. Why not try to design your own lighting and make your own lampshade for a table lamp?
Where to start, where to find inspiration? What materials are needed? You will find answers to these questions and several interesting master classes in this article.
DIY paper lampshade for a table lamp
Lamps with paper lampshades are not products that are made exclusively by craftsmen. Similar lamp caps are sold in many stores that sell lighting fixtures and home furnishings. Their price, as a rule, differs significantly from the cost of production. For this reason, many people decide to purchase cardboard, paper, and make them themselves. How to make a lampshade for a lamp out of paper with your own hands?
Paper selection
A paper lampshade can take on various shapes and be used in interiors of various styles. What paper should I buy?
- For manufacturing, it is necessary to purchase sufficiently high-quality and suitable paper, since the durability of the product directly depends on this.
- The paper cannot be thin, like regular paper, as this will quickly destroy the product.
- It must let light through.
The best option would be a rice paper cap. This material, despite its small thickness, is very durable. Rice paper is sold in sheets of various sizes. For example, a sheet with a colored pattern can have a size of 50 x 70 cm.
Made from rice paper
Rice paper can be glued onto an old lamp to give it a new look. You can also remove the old material and wrap new material around the metal frame. Sometimes the paper is additionally decorated using special stamps. This allows you to add additional decor to plain paper.

White paper lampshades are not only a tribute to the Far East, they are perfect for a Scandinavian-style interior. Almost everywhere where muted colors and natural materials dominate, you can safely use such solutions.
From wallpaper
Another interesting idea that does not require virtually any financial costs is a lampshade made from wallpaper for a floor lamp or table lamp. The most popular option is accordion-folded paper. For this purpose, wallpaper left over from a recent renovation will be useful; such an interior element will fit perfectly with the walls. If there is no wallpaper, you can always buy a roll from leftovers; large stores usually offer favorable discounts on such products. You can use wallpaper to make a lampshade for a table lamp, using an existing frame, or for pendant lamps.

What you will need:
- a piece of wallpaper;
- ruler;
- pen;
- hole puncher;
- lace.
How to make a lampshade from wallpaper - master class

This is a simple solution that even a child can do.

DIY lampshade made from mesh
In a modern apartment decorated in an industrial style, as well as in the garden, a lamp made of metal mesh and wire will work perfectly.

The mesh can be formed into any shape you like and the ends connected, for example, with thin wire.

Then, using wire, the mesh is attached to the top of the cable with the light bulb.

The shape of the lampshade is usually reduced to a ball or ellipse, but you can make any option, for example, a parallelepiped. To obtain this shape, you must use a frame made of durable wire or thick cardboard. The lampshade can be complemented with artificial flowers and intertwined with colored laces. As a result, the mesh loses its harsh minimalist character and the product can be used in an interior of a different style.
Made from lace
Lamps with lace lampshades will add lightness and elegance to the interior. Depending on the type of lace, they provide diffused or bright light. This lamp is suitable for:
- living rooms,
- bedrooms,
- children's rooms.
The main material required to make the body is lace. However, due to the relatively high price, lace can be replaced, for example:
- unused lace doilies;
- a piece of lace fabric;
- remnants of tulle curtains for windows.
The lace needs to be cut into circles, squares or stripes. The most labor-intensive process is gluing individual elements with glue. You can use regular wallpaper glue.


A lampshade for a chandelier looks very romantic, made from lace created with your own hands using a hook and a thin thread. Such a product will decorate a needlewoman’s room and will be an excellent demonstration of the needlewoman’s skills.


From beads
In this case, beads are used instead of paper and fabric. Made from beads, the glamorous lampshade lets in a lot of light. Its implementation is simple and the end result is definitely amazing.
You will need:
- lampshade frame,
- fishing line,
- beads.

Work order
- Attach the end of the fishing line to the frame.
- String beads or beads, making knots so that the balls do not move.
- Then attach the other end to the frame and place the beaded lines about 3cm apart.
Making a lampshade from threads with beads can be a little more labor-intensive than making crafts from paper or lace, but the unique and impressive decorative effect more than makes up for it.

Thus, there are many interesting ways to make a lampshade with your own hands. Using the above recommendations, you can refuse to buy an expensive, non-original lamp and replenish your interior with a unique decorative item of your own production.
Master class on making a lampshade at home - video